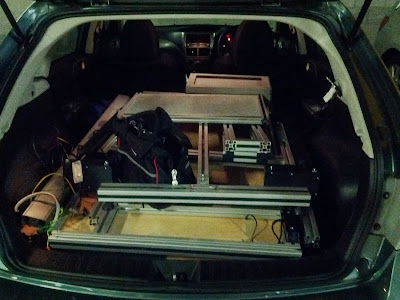
This is the third iteration of my electronics bench. The first was a small shelf in my bedroom. The second was an old sewing machine bench. This iteration uses a custom-made, electric height-adjustable table with two Linak linear actuators.
Bench space is approximately 1000x700mm. The height adjustment also makes it useful for many other types of work.
The bench started life as a much larger table that was being obsoleted at work. I was lucky enough to save this from the scrap heap.
It had to be disassembled to fit into the car.
The bench was cut down and modified to fit the available space in my workshop.
I added an upper shelf using 8020 40mm extrusion. The shelf and the backboard are made from 3mm composite sheet (a plastic core sandwiched between two aluminium exterior sheets that are coated in coloured plastic). The shelf rests on a 40x40x3mm piece of angled aluminium. This gives me the option of screwing or clamping it to the bench. A hole was also cut to pass power cables.
A tilting fluorescent lamp was also added to improve the usability of the space.
The bench gets cluttered very quickly, even before the power supply, oscilloscope and function generator are moved back. (Note the ESD mat on the right for sensitive electronics work, and the cutting mat with a glass plate on the left for other precision work).
To address this, the bench was modified even further to add a drawer underneath. Heavy duty drawer slides will be mounted to angle aluminium, and will support a plywood drawer. 500mm drawer slides were used, as I had a whole box of them available. They were also used in my lathe bench.
To constrain the opening length, I added a strategic socket head cap screw (marked in green) to jam the second rail. This gives ~300mm of travel, which is perfect for the 265mm deep drawer, (which is the maximum that can fit under the table).
Arms wide open and ready to accept a drawer...
The drawer is made from the same 9mm marine grade plywood that is used in my cajon. Here it is being glued together using my welding jigs.
The base is made from 6mm plywood, which was glued and nailed into place.
Still to come ...
- Finishing and fitting the drawer
- Tidying up the bench
- Adding a second power board for fixed equipment.


thanks... www.escolatecnicarj.com.br
ReplyDeletecurso técnico em eletronica com CREA
http://www.escolatecnicarj.com.br
ReplyDeletehttp://www.escolatecnologicarj.com.br
são os sites dos cursos
Curso de Drones no Rio de Janeiro RJ e São Paulo SP https://www.academiadepilotos.com.br
ReplyDeleteCurso de drones rio de janeiro sp são paulo rj
ReplyDeletehttps://www.escolatecnologicarj.com.br
https://www.academiadepilotos.com.br
https://www.escolatecnicarj.com.br
https://www.ntpro.com.br
https://www.dronemasteracademy.com